MV-Quad Eyes Screenshots and Explanation
Note: Host System Only
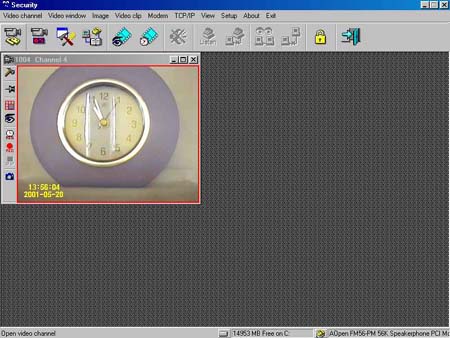 |
This is the main program window. The screen can display up to 16 cameras at a time. All options for each camera may be accessed by right clicking on the video windows and choosing 'setup video channel'. Or by using the 'Video Channel' menu to either open or setup video channel. |
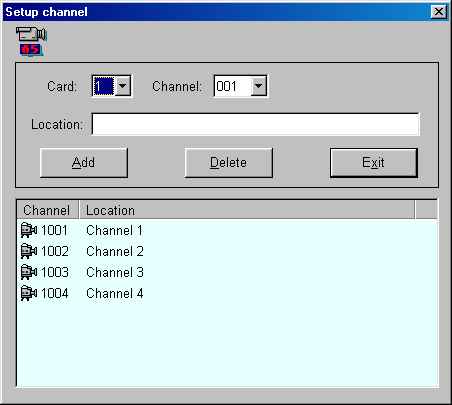 |
This menu is accessed by selecting the 'Video Channel' menu and then 'Setup Video Channel'. It's purpose is to name and assign each camera. For instance I could type in 'My office' under location, select Card 1, and channel 1 and hit Add. Then whenever I opened 'My office' it would display the first video input on card one. |
 |
This menu is found by going to the 'Video Channel' menu and then 'Open Video Channel'. Since above we setup our cameras now we can setup what each will do. Check enable motion detection and/or enable sequence recording. It's fairly self explanatory. |
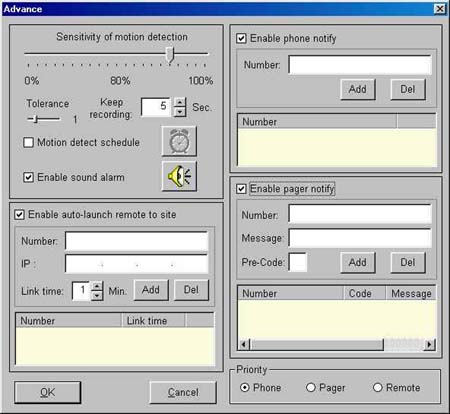 |
After you click the button below the check box in the above menu you get this one. This is for setting up you motion detection and alarm mechanisms. The top left is your sensitivity settings and can be changed until satisfication. The 'Enable sound alarm' is to allow you to play a WAV file upon detection. Below that is the menu to request the software upon motion detection to either dial and connect with a remote machine or use TCP/IP network or internet connections or both. Upon connection it will begin transfering video. The top right is for the system to call your phone and leave an audio message and lastly leave pager messages. The bottom is priority. |
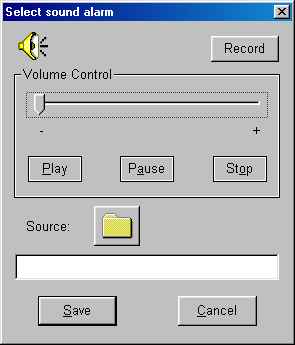 |
This is the menu under 'Enable Sound Alarm' for choosing which WAV file you wish you have for an alarm. We provide many alarm files for you. But if you have a microphone you can hit record and make a noise of your choice. Hit the yellow folder button to choose the location and the file. Then hit save to exit or cancel to not change. Volume is self explanatory. |
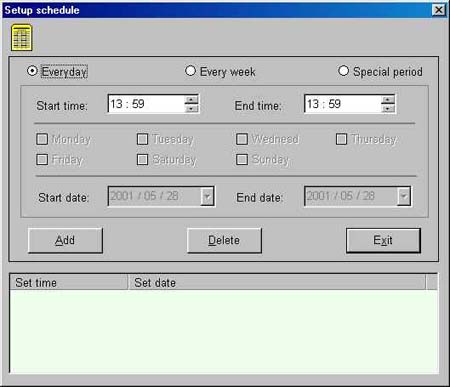 |
When you check the 'Enable Sequence' recording checkbox and hit the button below it under 'Open video channel' you get this menu. You choose when you would like the camera to record; daily, certain days, times, special period. Then you hit add. Simple as that. |
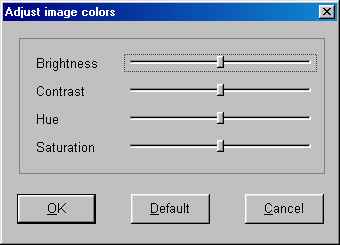 |
Under the 'Image' menu there is 'Adjust image colors'. This menu will aid you in tweaking the brightness, contrast, hue and saturation of your cameras field of view. |
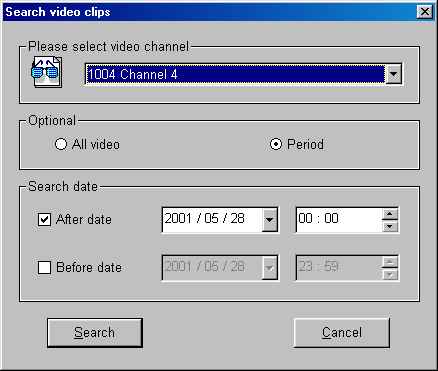 |
Under the 'Video Clip' menu there are two options; 'Playback Detection Video' and 'Playback Sequencing Video'. Each is for searching your recordings for the appropriate date and event. Period let's you specify certain days. 'All video' will simply give you all the movies for that camera under motion detection or sequencing depending on what menu item you hit. Works very well. |
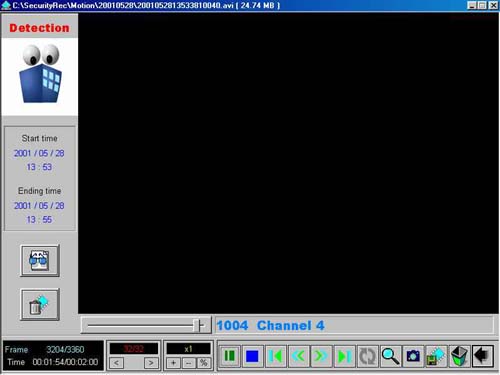 |
This is the Video playback screen from the search. As you can see it will provide the movies found for Camera 4, on card 1, in detection mode. In this case there were 12. You can save snapshots of frames in movie. Alter playback speed to 10 times slower then normal or 100 times faster viewing with the +/- buttons, Magnify with the magnifying glass. Delete movies with the trash can. Exit back to main program with the black back arrow on the right. |
 |
Under the 'Modem' menu click 'Select Modem' and ths menu appears. Check monitor to allow remote connections. Uncheck for standalone. Use drop down menu to select modem. Select to finish. |
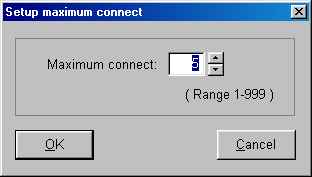 |
Under the 'TCP/IP' menu select 'Setup Maximum Connect' you can specify how many connections you will allow. For instance if you had 1 remote user, set it to 1. It's as easy as that. |
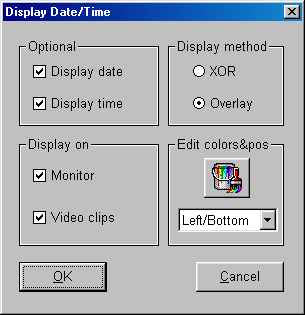 |
Under the 'View' menu and 'Disply Date/Time' you can specify to display the date/time on your monitor window and/or on your video clips and where. Fairly self explanatory. Then click OK button. |
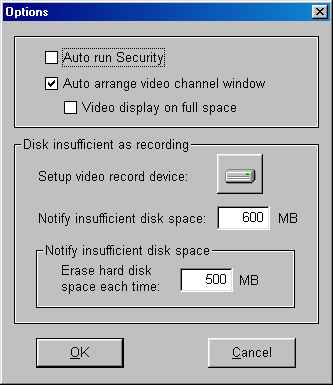 |
Under the 'Setup' menu and 'Options' this dialog appears. You can set the sysem to run on startup, auto arrange the windows to fit, to notify you when drive space gets low or automatically erase a certain amount to make room for new video capture. Then click OK button when finished. |
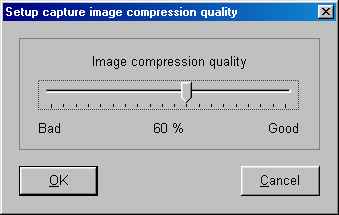 |
Under the 'Setup' menu and 'Setup Capture Image Compresion Quality' you can specify the compression ratio of your videos. The default is 60%. Then click OK button and you're done. |
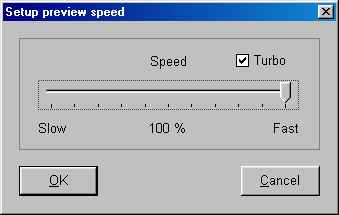 |
Under the 'Setup' menu and 'Setup Preview Speed' you can set how fast the cameras will show video. This is the fastest setting. |
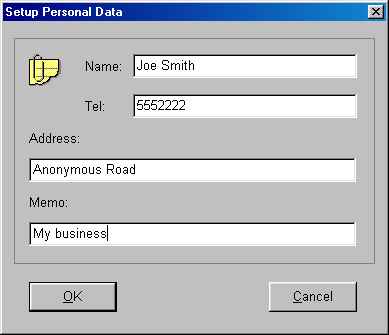 |
Under 'Setup' menu and 'Setup Personal Data' you can specify your name, phone number, address and a short memo to keep on hand. |
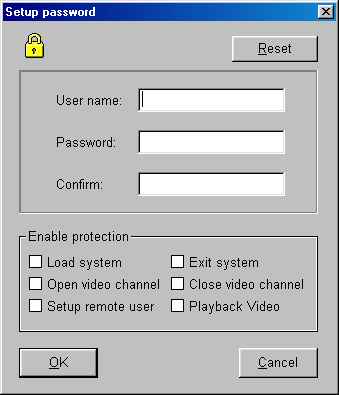 |
Under the 'Setup' menu and 'Setup Password' you can set a username and password to access your security system so that no one else can. You can specify when to be prompted for login/password with the checkboxes at the bottom. Very useful for security purposes. |
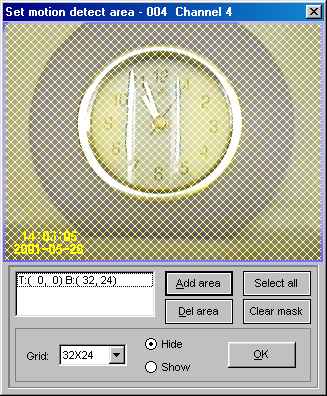 |
In any camera video windows there is a button on the right that is red and looks like a grid that upon clicking gives you this window. This window is for creating mask zones where the motion sensor looks for motion. For instance you may have a TV in a room that you would put masks surrounding it so that the motion sensor would not be triggered by the TV. Also you can set a grid from 2x2 up to 64x48 for more accuracy. Then click ok. |
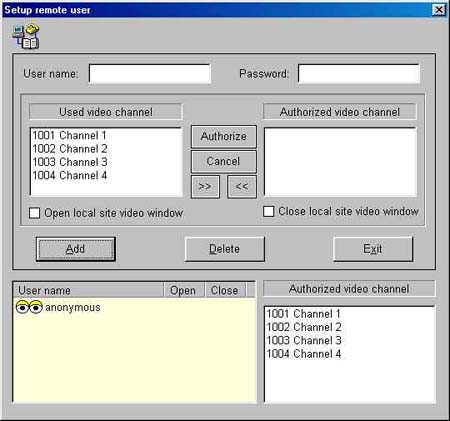 |
Under 'Video Channel' menu and 'Setup Remote User' this window appears. One of the most important ones for remote use of this system. Specify a username and password choose what cameras to authorize by highlighting and hitting 'Authorize' button and then choose whether to open or close the local site's video windows or the cameras for that user and finally hit Add button. Done. |
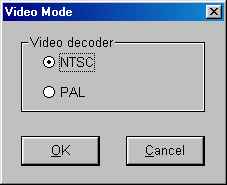 |
Under the 'Video Channel' menu and 'Select Video Mode' this window appears. Simply choose NTSC or PAL. Note: NTSC is North American. |